Hi-Vis Vest Sizing and Fit: How to Get Class, Coverage, and Comfort Right
A hi-vis vest that fits badly is not just uncomfortable, it can quietly fall out of compliance. Sizing decides how much high-visibility background fabric and reflective tape actually ends up on a worker’s torso, and that is the same material the ANSI/ISEA 107 standard measures when it assigns a garment its class. Get the size run wrong and you end up with vests that ride up, gap at the sides, or in the smallest cuts, no longer carry enough material to hold the class printed on the label. Here is how to specify size and fit so the vest performs the way the spec sheet promises.
Pick the class first, because size can limit it
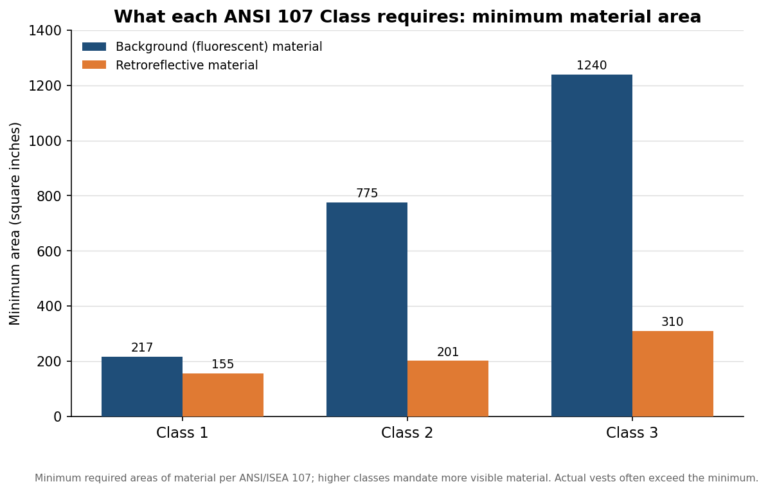
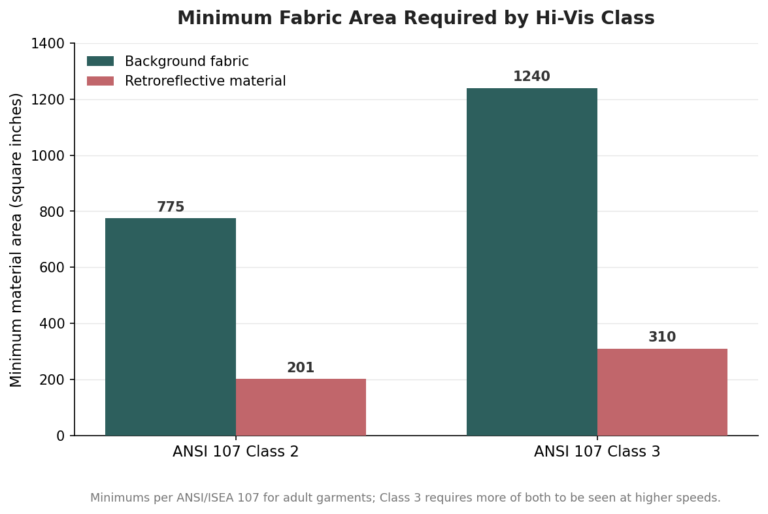
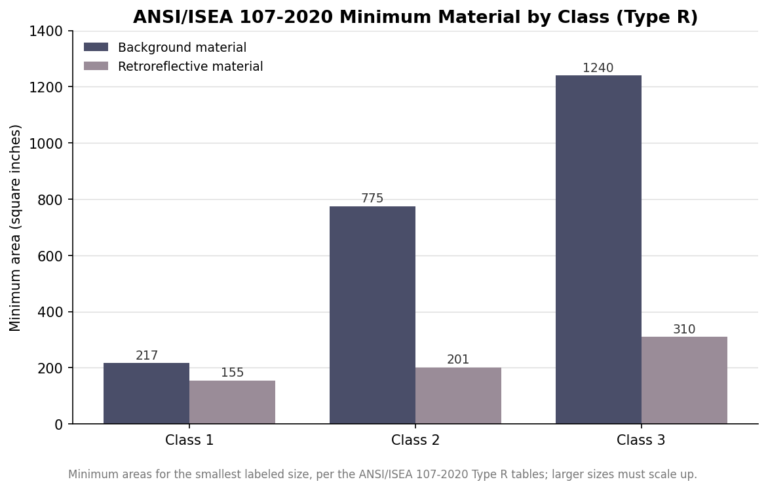
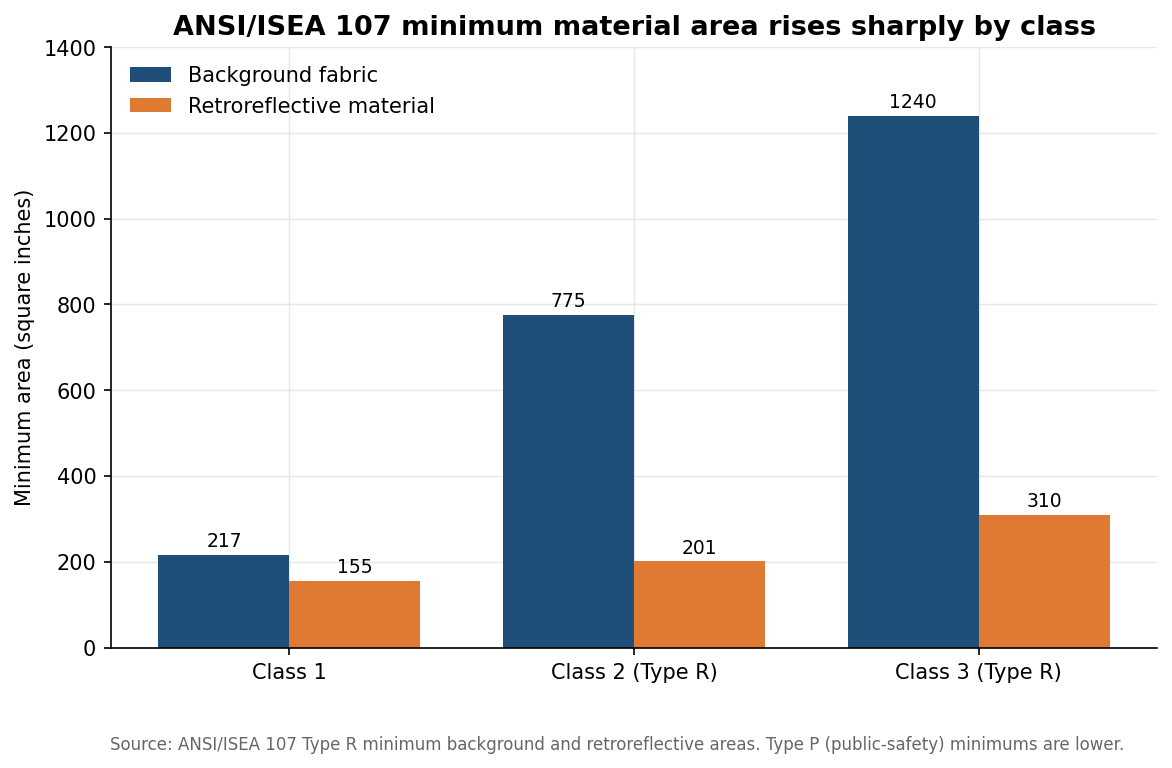
The area minimums in ANSI 107 are fixed numbers, not percentages of the garment. A Class 2 Type R vest has to carry at least 775 square inches of background fabric and 201 square inches of retroreflective material. Step up to Class 3 Type R and those figures jump to 1,240 and 310 square inches. Nothing about those totals shrinks for a smaller wearer, so the surface area of the vest itself becomes the constraint.
On a very small adult or a youth-sized cut, there may simply not be enough torso to lay down 1,240 square inches of background fabric, which is why some vest lines are sold as Class 2 in the smallest sizes and Class 3 only from a medium or large upward. If your crew includes small-framed workers who need Class 3 for nighttime roadway exposure, confirm the manufacturer certifies that specific size to Class 3 rather than assuming every size in the run shares one label. This is the single sizing detail buyers miss most often, and it is worth a direct question to the supplier before a bulk order.
Measure the chest, then add for what goes underneath
Start with a tape measure around the fullest part of the chest, kept level and snug but not compressed. That single measurement drives the size band. The complication is layering: a vest worn over a t-shirt in summer should be sized close to the chest measurement, but the same worker over a hoodie or an insulated jacket in winter needs roughly 2 to 4 inches of extra room, or a full size band up, so the vest still closes cleanly.
Vests are cut with some layering room built in, but there is a limit. A vest stretched tight over a bulky coat pulls the reflective bands out of the position they were designed to sit in and can distort the 360-degree visibility the standard assumes. If a crew swaps between light and heavy layers across seasons, size for the heavier layer and let the side adjustment take up the slack in summer rather than the other way around.
Read a combined size chart correctly
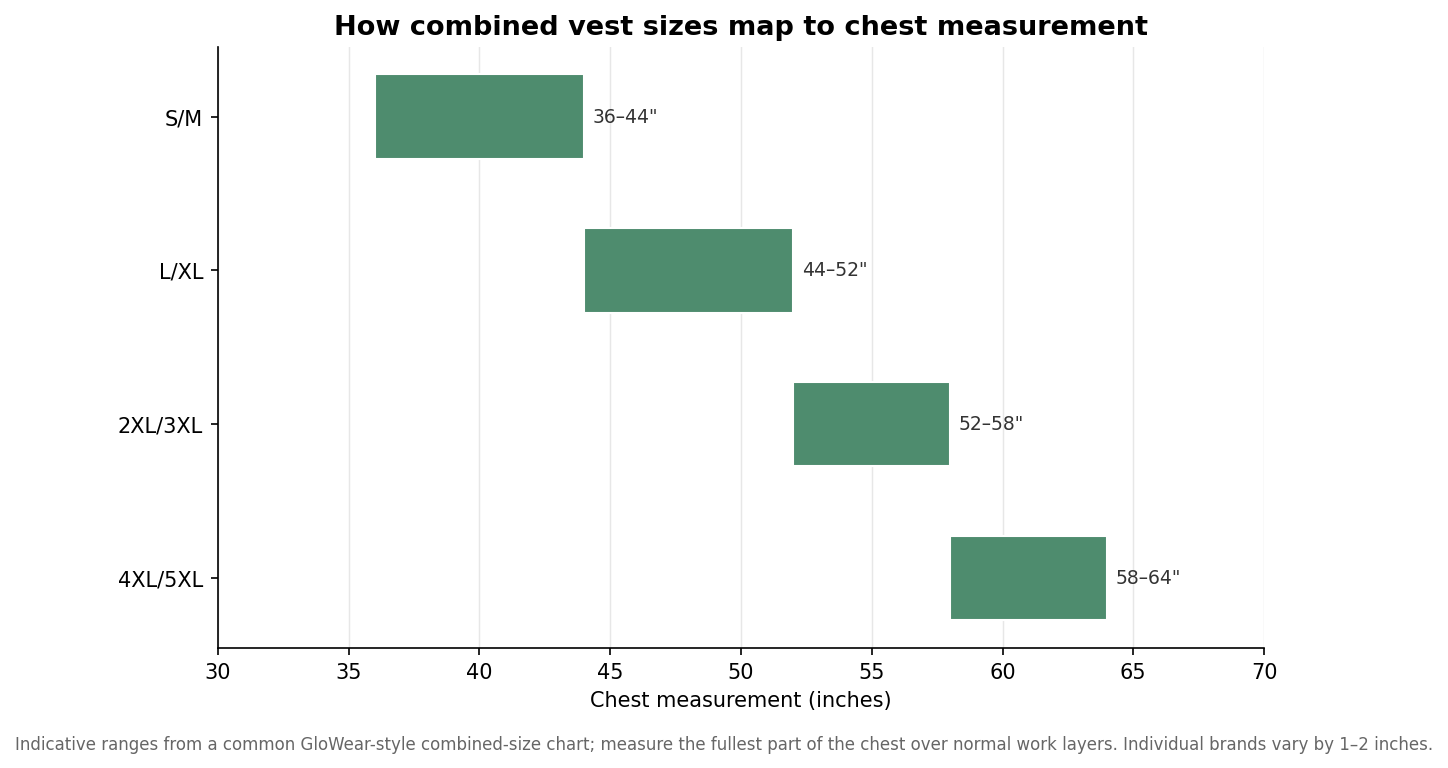
Most economy and mid-range vests ship in combined bands, S/M, L/XL, 2XL/3XL, rather than single letter sizes. A worker with a 44-inch chest sits right on the boundary between S/M and L/XL, and in that situation coverage usually wins: size up so the vest closes without tension on the hook-and-loop or zipper. The reason a single band can span an 8-inch chest range at all is that most vests use elastic or hook-and-loop side closures, so the same shell adjusts across several inches. That adjustability is a feature, but it is not a substitute for ordering the right band.
Two other cuts matter for mixed crews. Women’s or contoured vests are shaped differently through the shoulders and length and fit many workers far better than a unisex cut sized down. Tall or long-body versions add torso length for workers whose chest measurement understates their frame. Where a supplier offers them, mixing these into the order costs little and cuts down on the ride-up and gapping that make a standard vest look and perform worse than its spec.
Order for a whole crew, not an average
The most expensive sizing mistake at bulk is ordering a single size to keep the purchase order simple. A general adult workforce usually skews toward the L/XL and 2XL/3XL bands, with a smaller share of S/M and a handful of 4XL/5XL, but a mixed-gender crew needs meaningfully more small and women’s cuts than a rule of thumb suggests. The only reliable input is your own roster, so collect chest measurements or existing shirt sizes before the first order and keep that mix on file for reorders.
Build in a modest buffer, often in the range of 5 to 10 percent, for new hires, replacements, and the vest that gets torn or soaked mid-shift. For decorated bulk vests, expect a lead time commonly measured in a couple of weeks once artwork is approved, while plain blanks off the shelf turn around faster. Those are indicative ranges, not guarantees, and any hard deadline is worth confirming against a specific quote.
Sizing mistakes that cost money
Beyond the universal-size trap, two errors show up again and again. The first is ignoring layering and ordering to summer measurements for a year-round crew, which leaves workers unable to close their vests in January. The second is over-customizing a small vest: adding large printed panels or trimming a vest to fit can cover or cut into the certified background and reflective area, and on a borderline garment that can push it under the labeled minimum. Keep decoration within the areas the manufacturer designates for logos, and never alter a vest’s dimensions after purchase if you need it to hold its class.
The size chart and the class label are the same conversation. Match the chest measurement, respect the layering allowance, order to your real roster rather than an average, and confirm the smallest sizes still clear the area minimums, and every vest in the run will do on the shoulder what it claims on the tag.